Adding Custom Object Write Back in RevSure Salesforce Data Source Mappings
Configure Salesforce custom objects and attribute mappings so RevSure can write data back during scheduled syncs.
1. Add the Salesforce custom object
Navigate to Data Sources > Salesforce > Mappings. Click Add Object, search for the custom Salesforce object, select it, and click Apply.
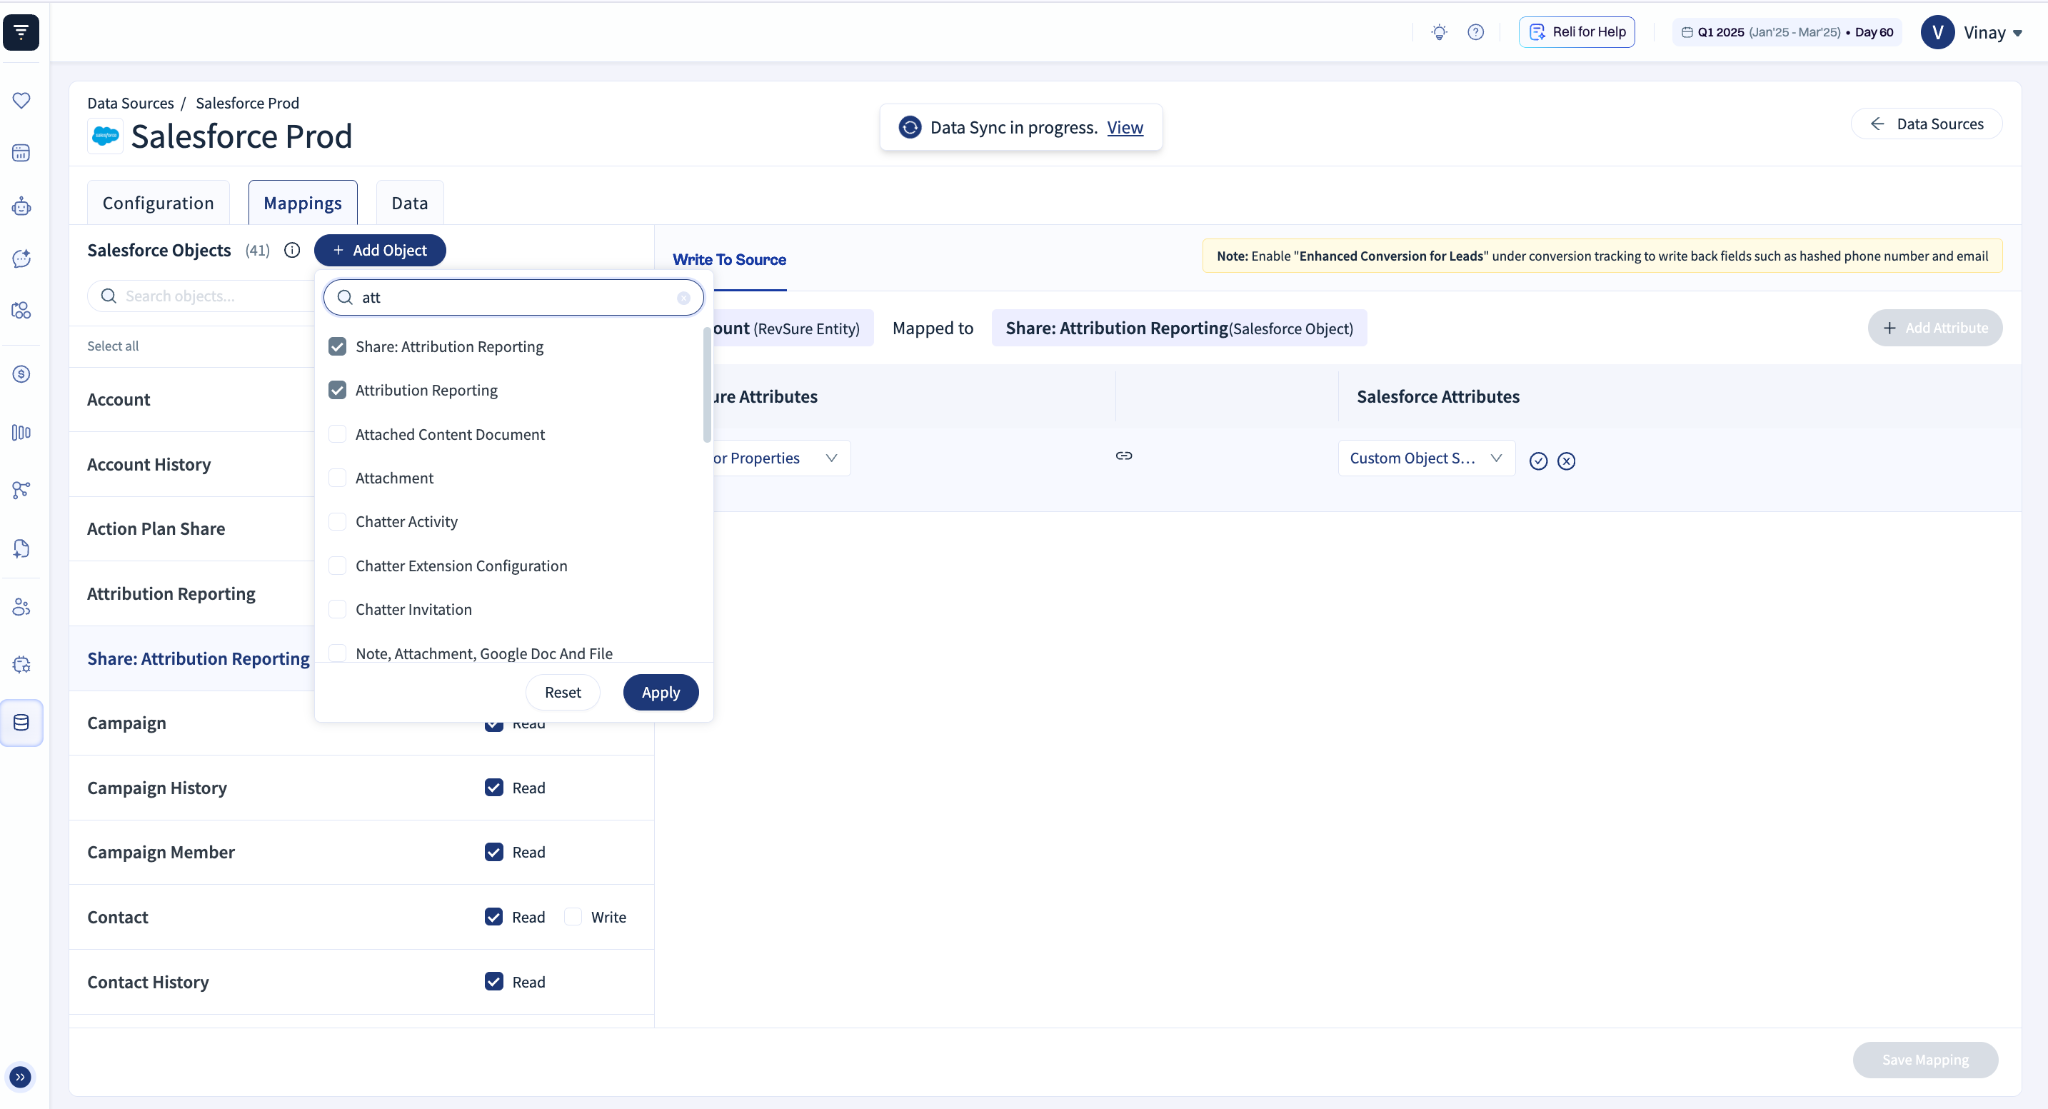
Figure 1. Select the Salesforce object using Add Object.
2. Choose access and the RevSure entity
In the confirmation dialog, select Read only, Write only, or Read + Write. Select the RevSure entity that will provide the data for write back (for example, Account or Lead), then click Update.
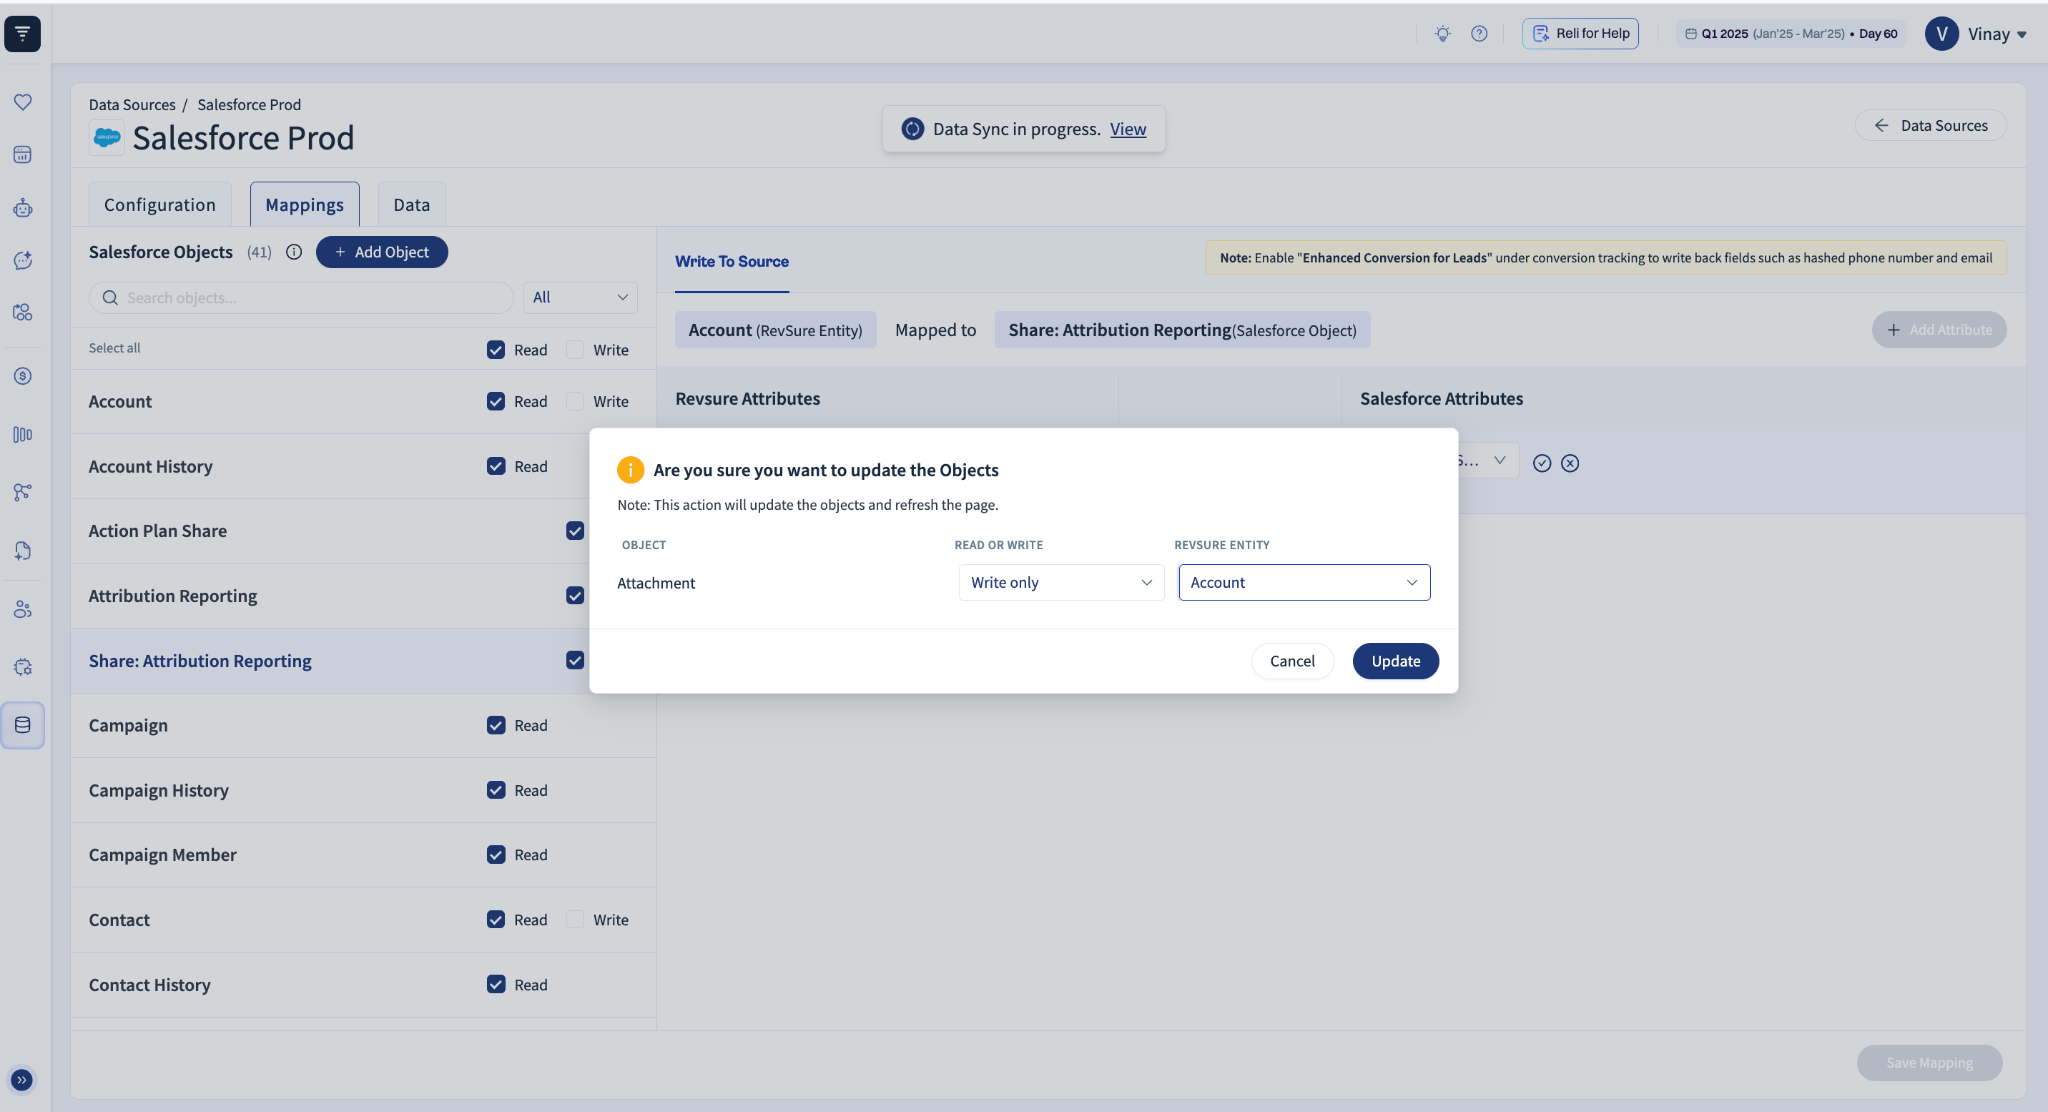
Figure 2. Configure access and select the source RevSure entity.
3. Verify and select the External ID
Return to the Mappings page and open the Write To Source mapping for your object. An External ID field is required for upsert write back. When exactly one eligible External ID field is available, it appears in the Salesforce attribute mapping. When the Salesforce object has multiple External ID fields, choose the one relevant to this writeback from the Salesforce Attributes dropdown. Select the field that uniquely identifies the corresponding RevSure records and is populated consistently.
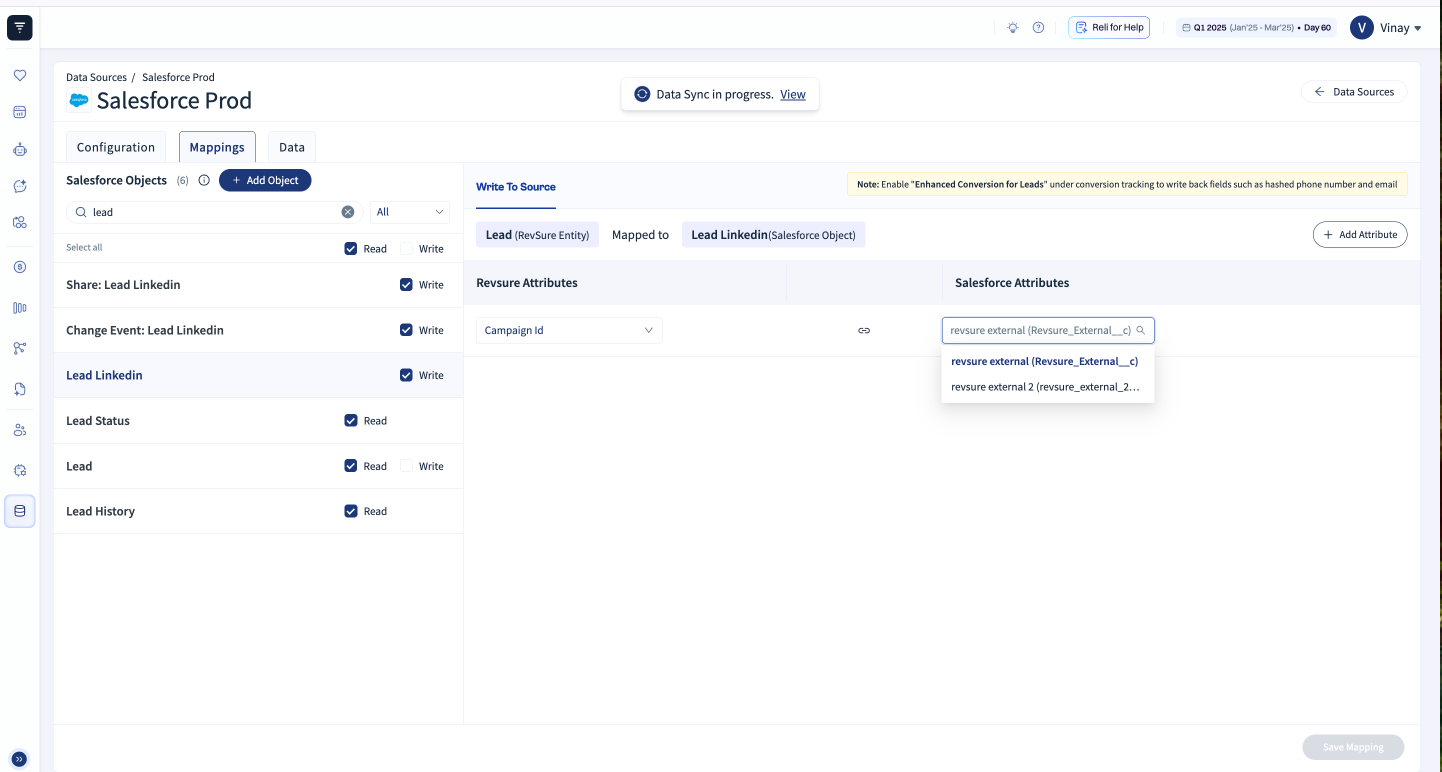
Figure 3. Choose the relevant External ID when multiple external IDs exist.
Important: If the Salesforce custom object does not have an External ID field, add and configure one in Salesforce before proceeding with upsert write back. Ensure the field is suitable for uniquely matching records and map it to the appropriate RevSure identifier. |
4. Configure attribute mappings
For each field to write back, select the RevSure attribute on the left and its corresponding Salesforce attribute on the right. Use Add Attribute to configure additional field mappings. Verify that the selected fields have compatible values and intended meanings.
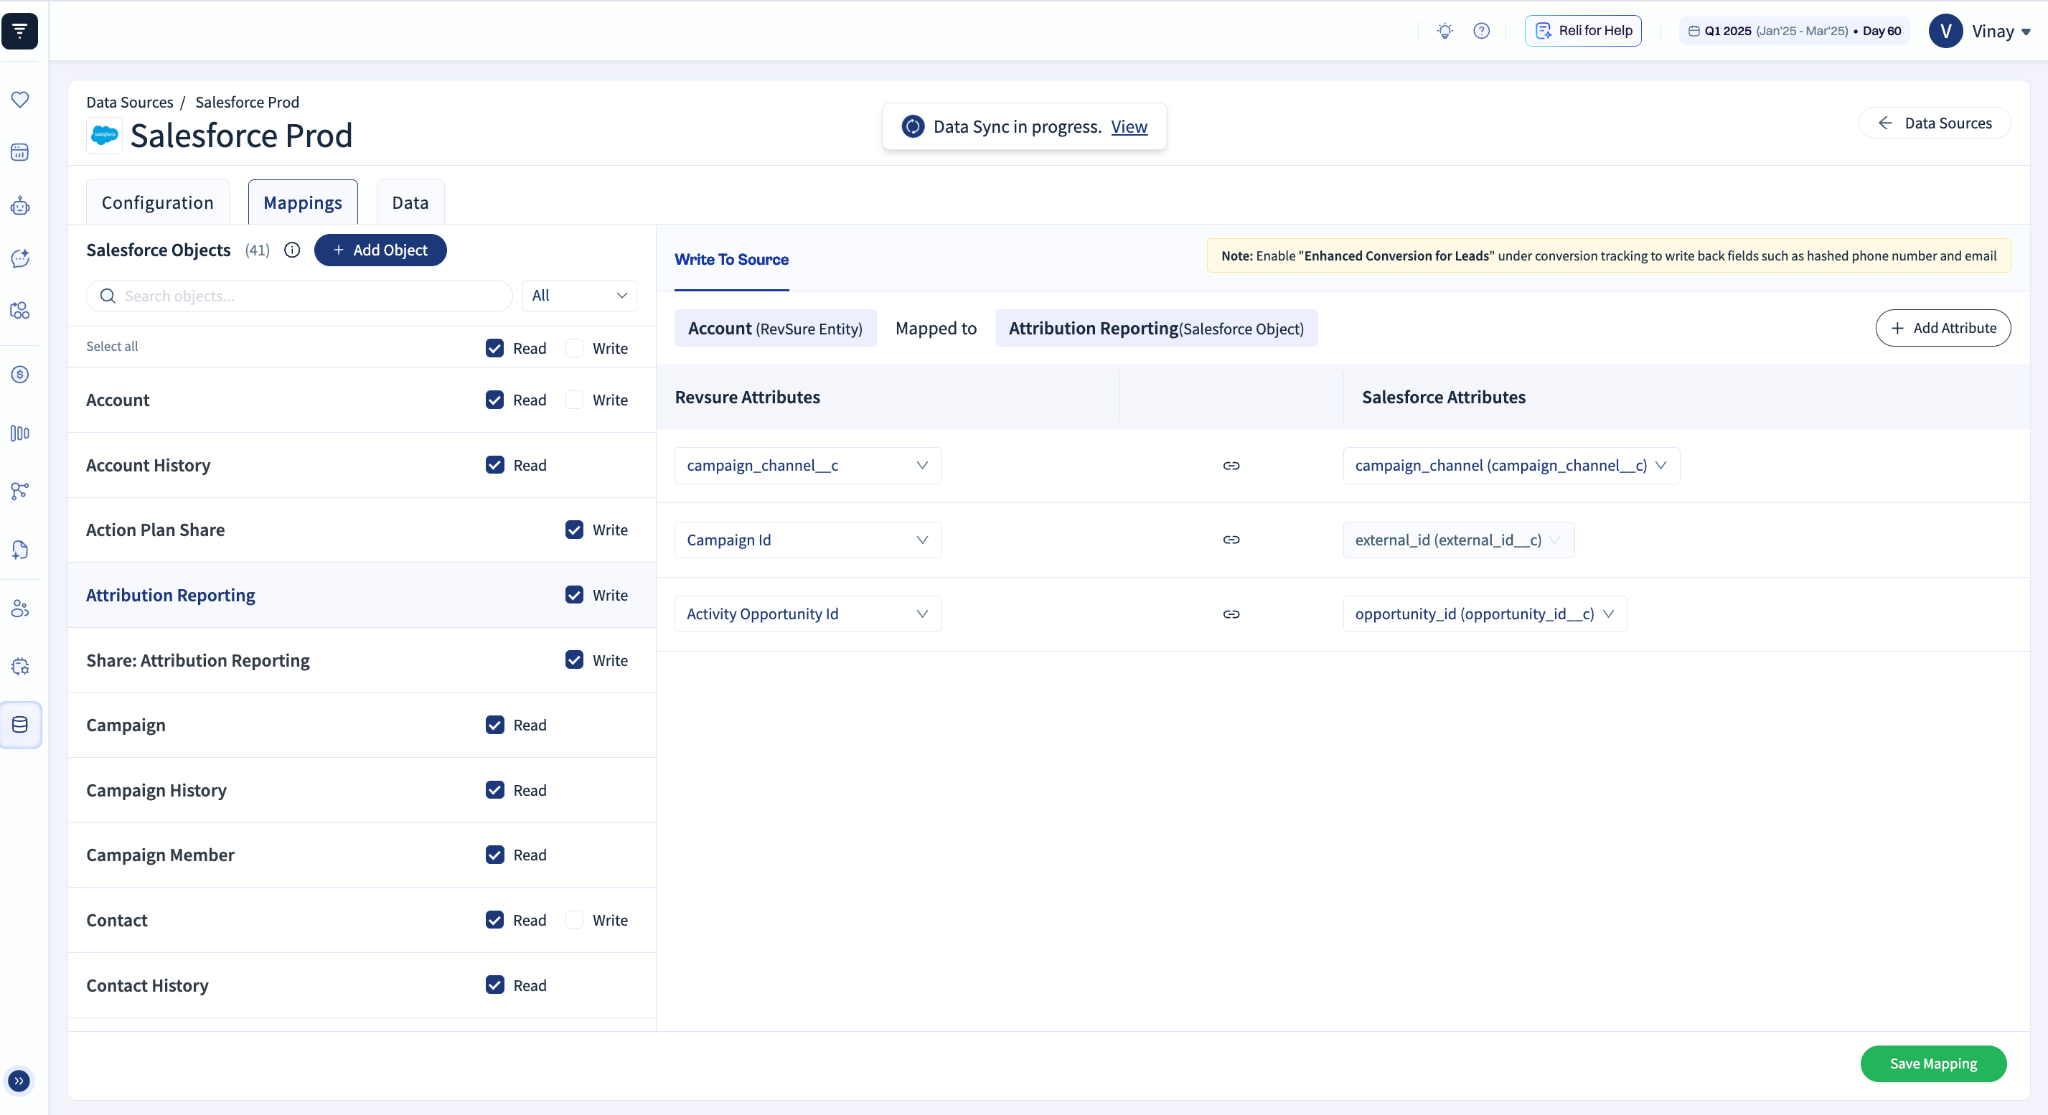
Figure 4. Map RevSure attributes to Salesforce fields, including the External ID.
5. Save the mappings
After reviewing the mapping rows, click Save Mapping at the bottom right of the page.
6. Sync the mappings
In the mapping synchronization dialog, select Keep existing data and click Sync Mappings. This retains the existing RevSure data while adding data from the updated mappings in the next sync.
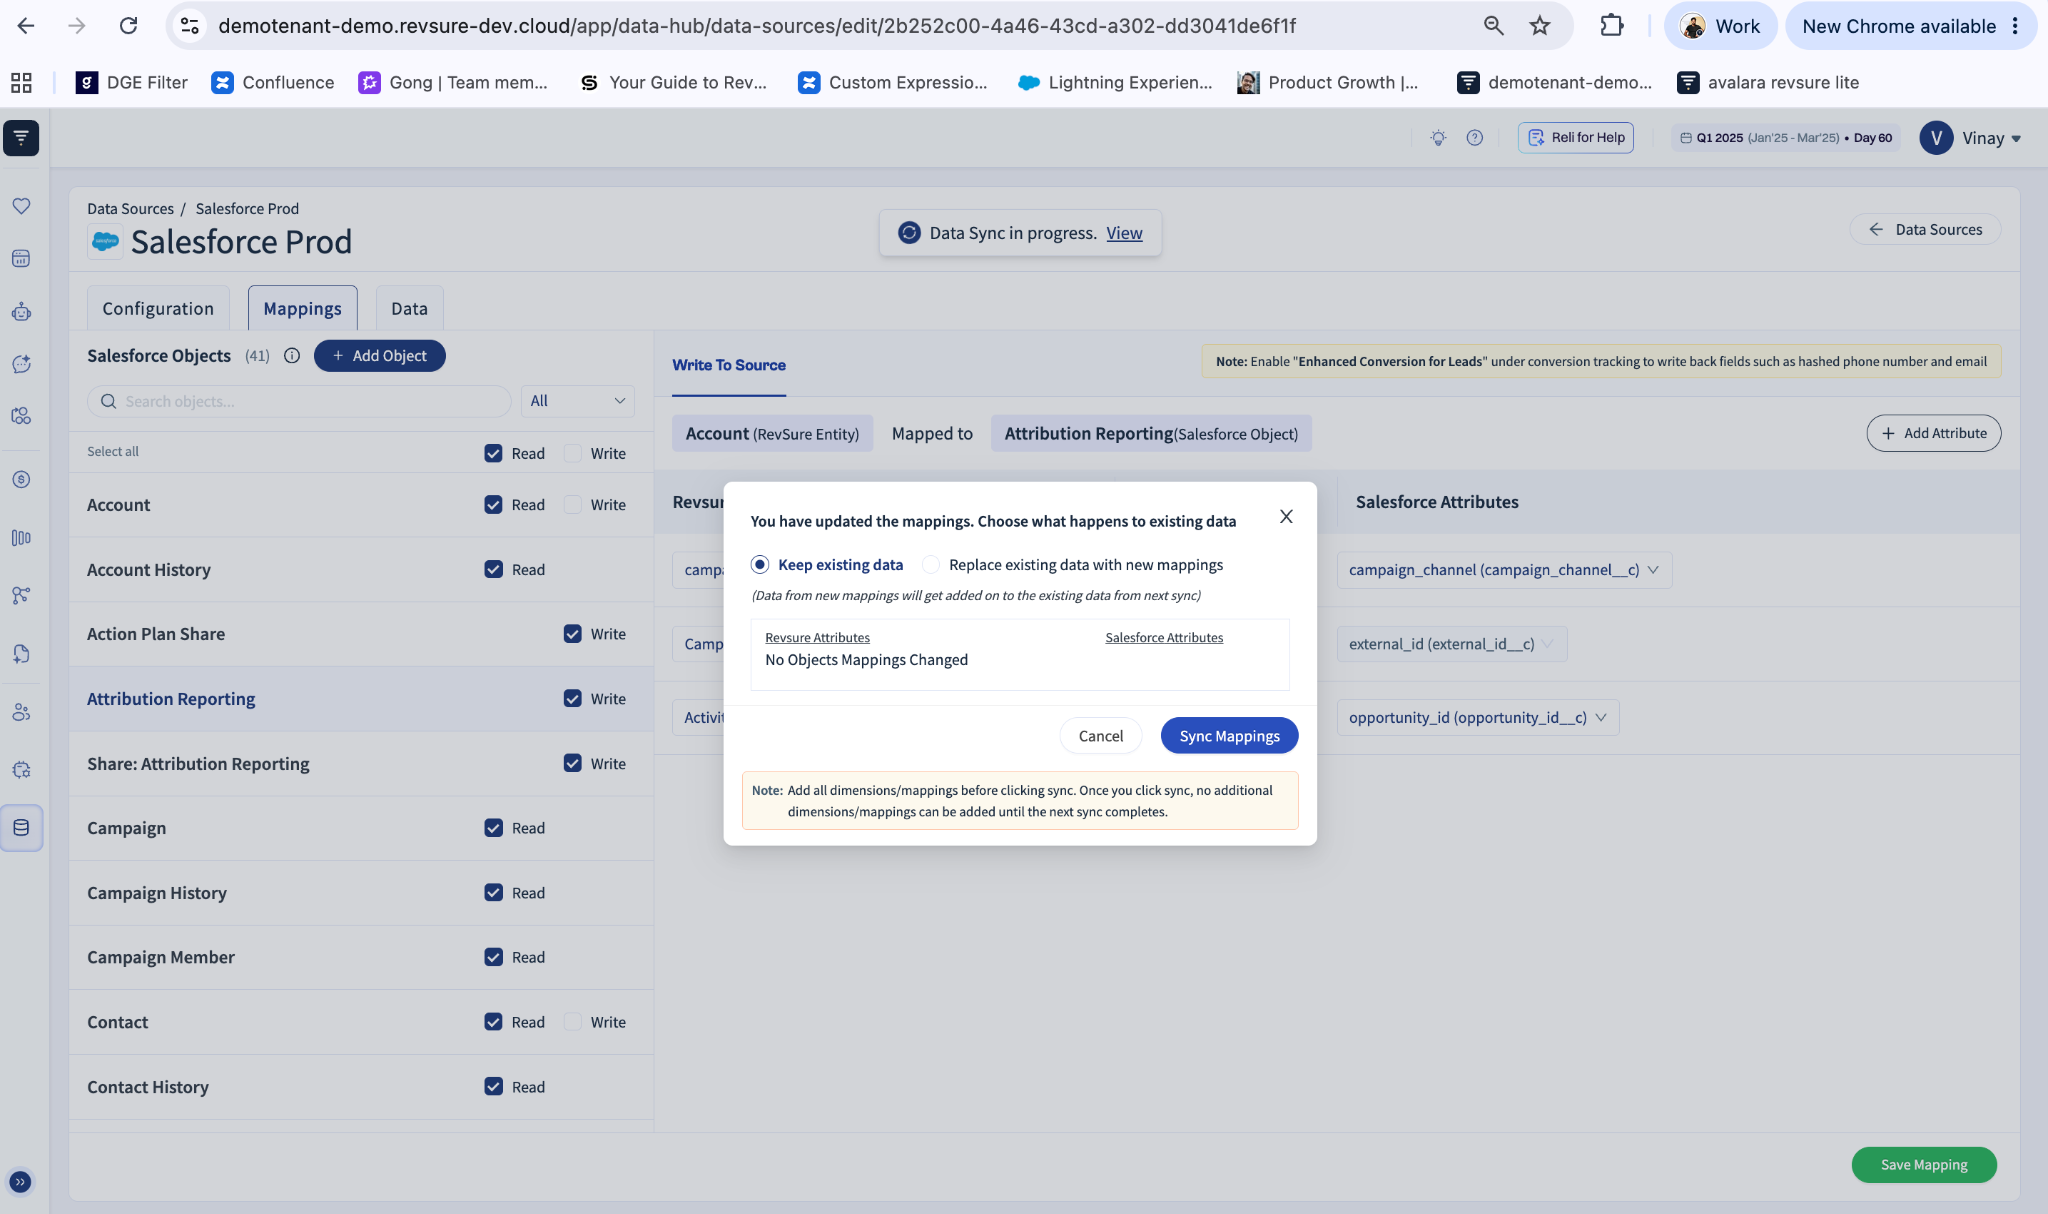
Figure 5. Keep existing data and sync the updated mappings.
7. Write data back on subsequent syncs
Once configured and synced, RevSure writes mapped data to the selected Salesforce custom object during each applicable sync. The selected External ID is used to match records for upsert, while the attribute mappings determine which values are written.
Reminder: Verify Salesforce field permissions and that the integration has write access to the selected object and fields. External ID configuration is mandatory for upsert write back. |