Credentials Required - These will have to be added by your Claude Account Owner
To configure the connector, you will need the following credentials:
The MCP server URL
OAuth client ID
These will be provided by the RevSure team.
Preliminary Steps (For Owners)
Before members of Team and Enterprise plans can configure custom connectors, an Owner or Primary Owner needs to follow these initial steps to add a custom connector to your organization:
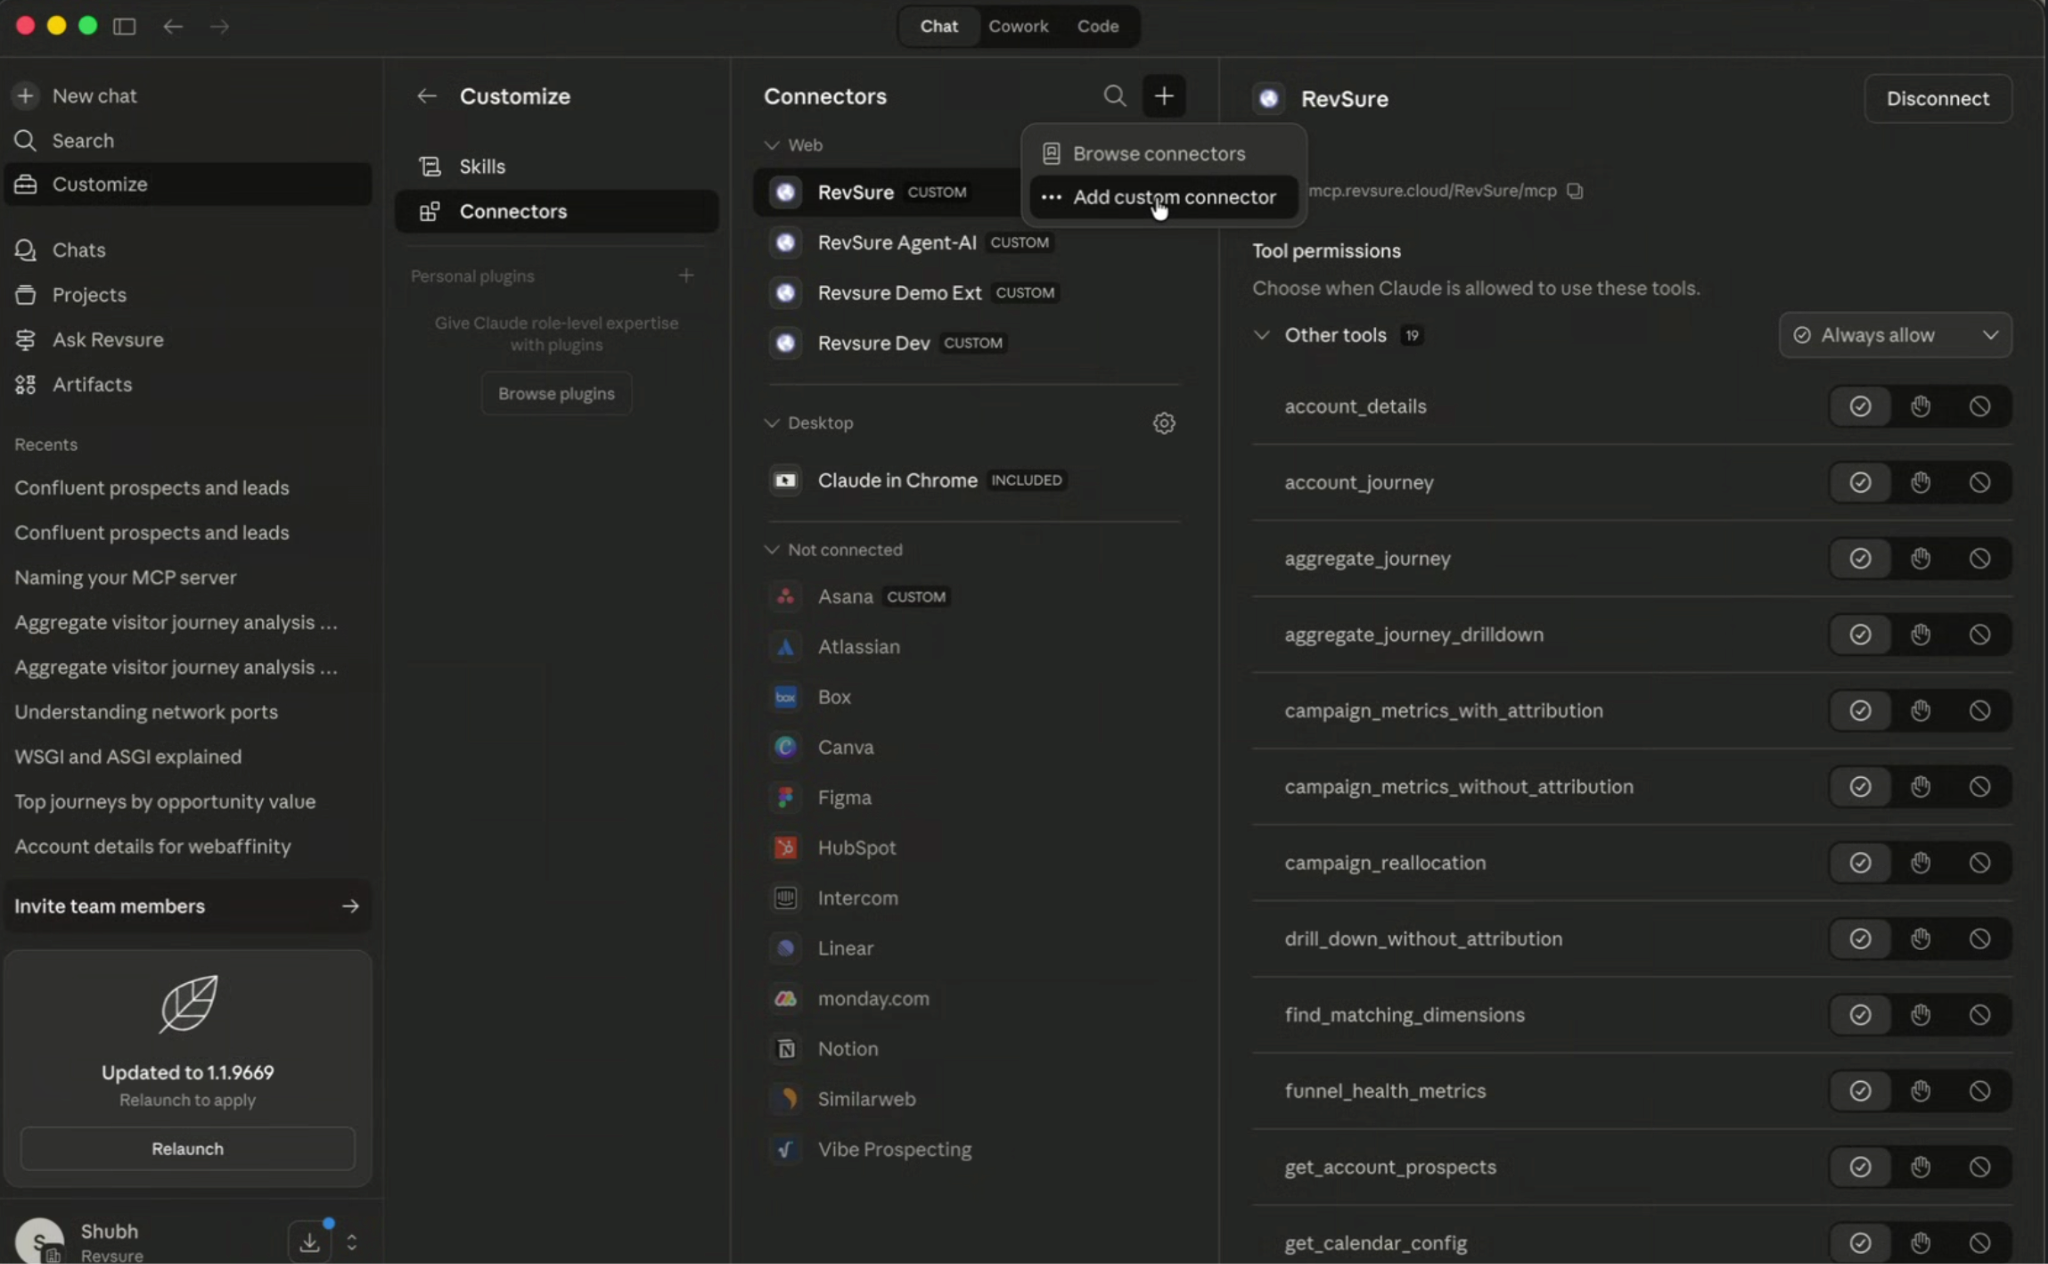
In the left sidebar, click Customize → Connectors.
Click the + button in the top-right corner of the Connectors panel (next to the search icon).
In the popup that appears, select "Add custom connector".
A configuration form will open.
Step 2: Configure the MCP Server
Choose a suitable name. [RevSure is preferred]
Enter the MCP Server URL:
None
[MCP Server URL (check Prerequisites)]Click on Advanced Settings.
Add the OAuth Client Id as: [OAuth Client ID (check Prerequisites)]
Leave OAuth Client secret blank
Step 3: Authenticate with RevSure
You will be redirected to the RevSure login page.
Enter your RevSure credentials and log in.
Once authenticated, the connector is active — you can now use Claude with RevSure.
Step 4: Enable Auto-Approval for Tool Calls (Recommended)
Click on Always Allow for all tools.
This prevents Claude from prompting you for approval on every individual tool call.
Step 5: Start Using the Connector
Open a new chat.
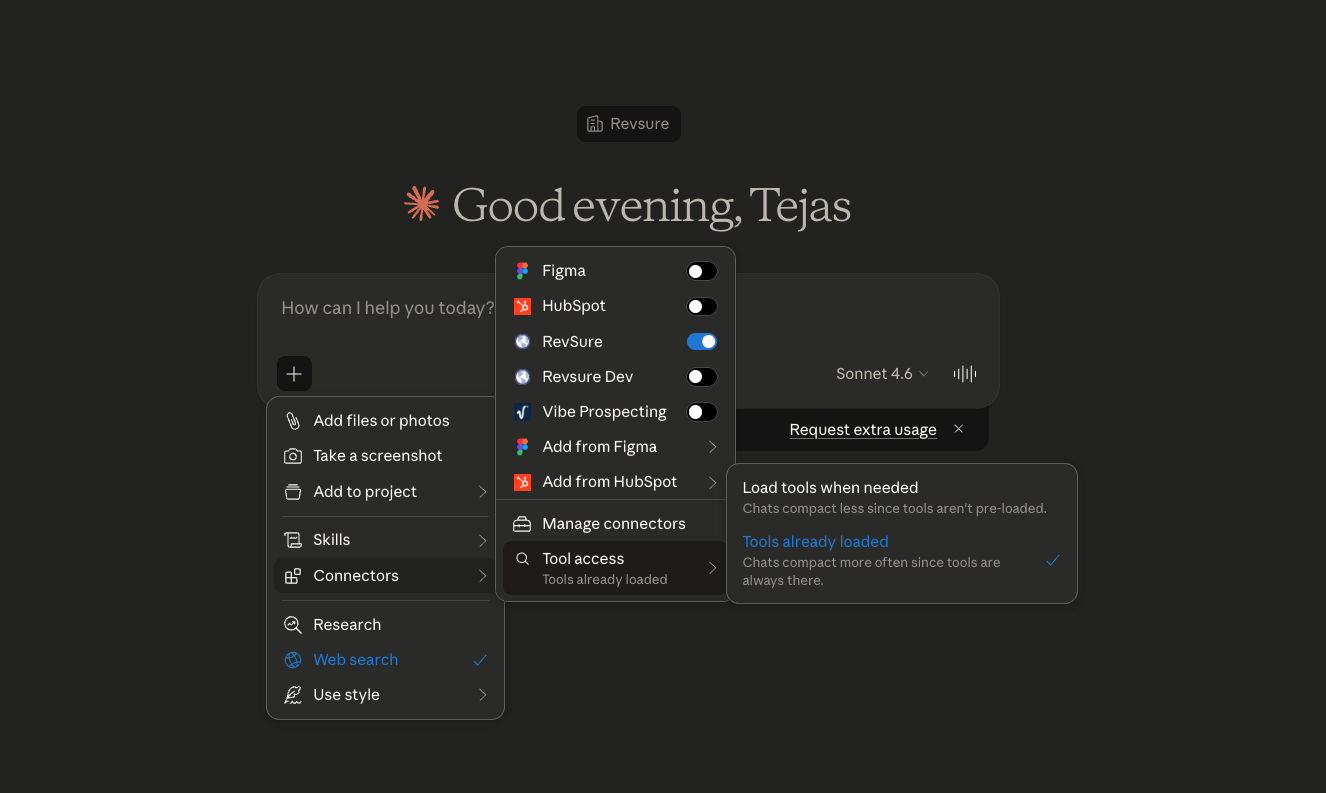
Click the + icon in the input prompt box.
Click on Connectors and make sure the MCP connector is enabled.
Click on Tool Access.
Select the “Tools already loaded” option to enable them for the conversation.
Steps for Members (After Connector is Configured)
Once an Owner has added the custom connector, team members can connect it by following these steps:
Step 1: Connect the Connector
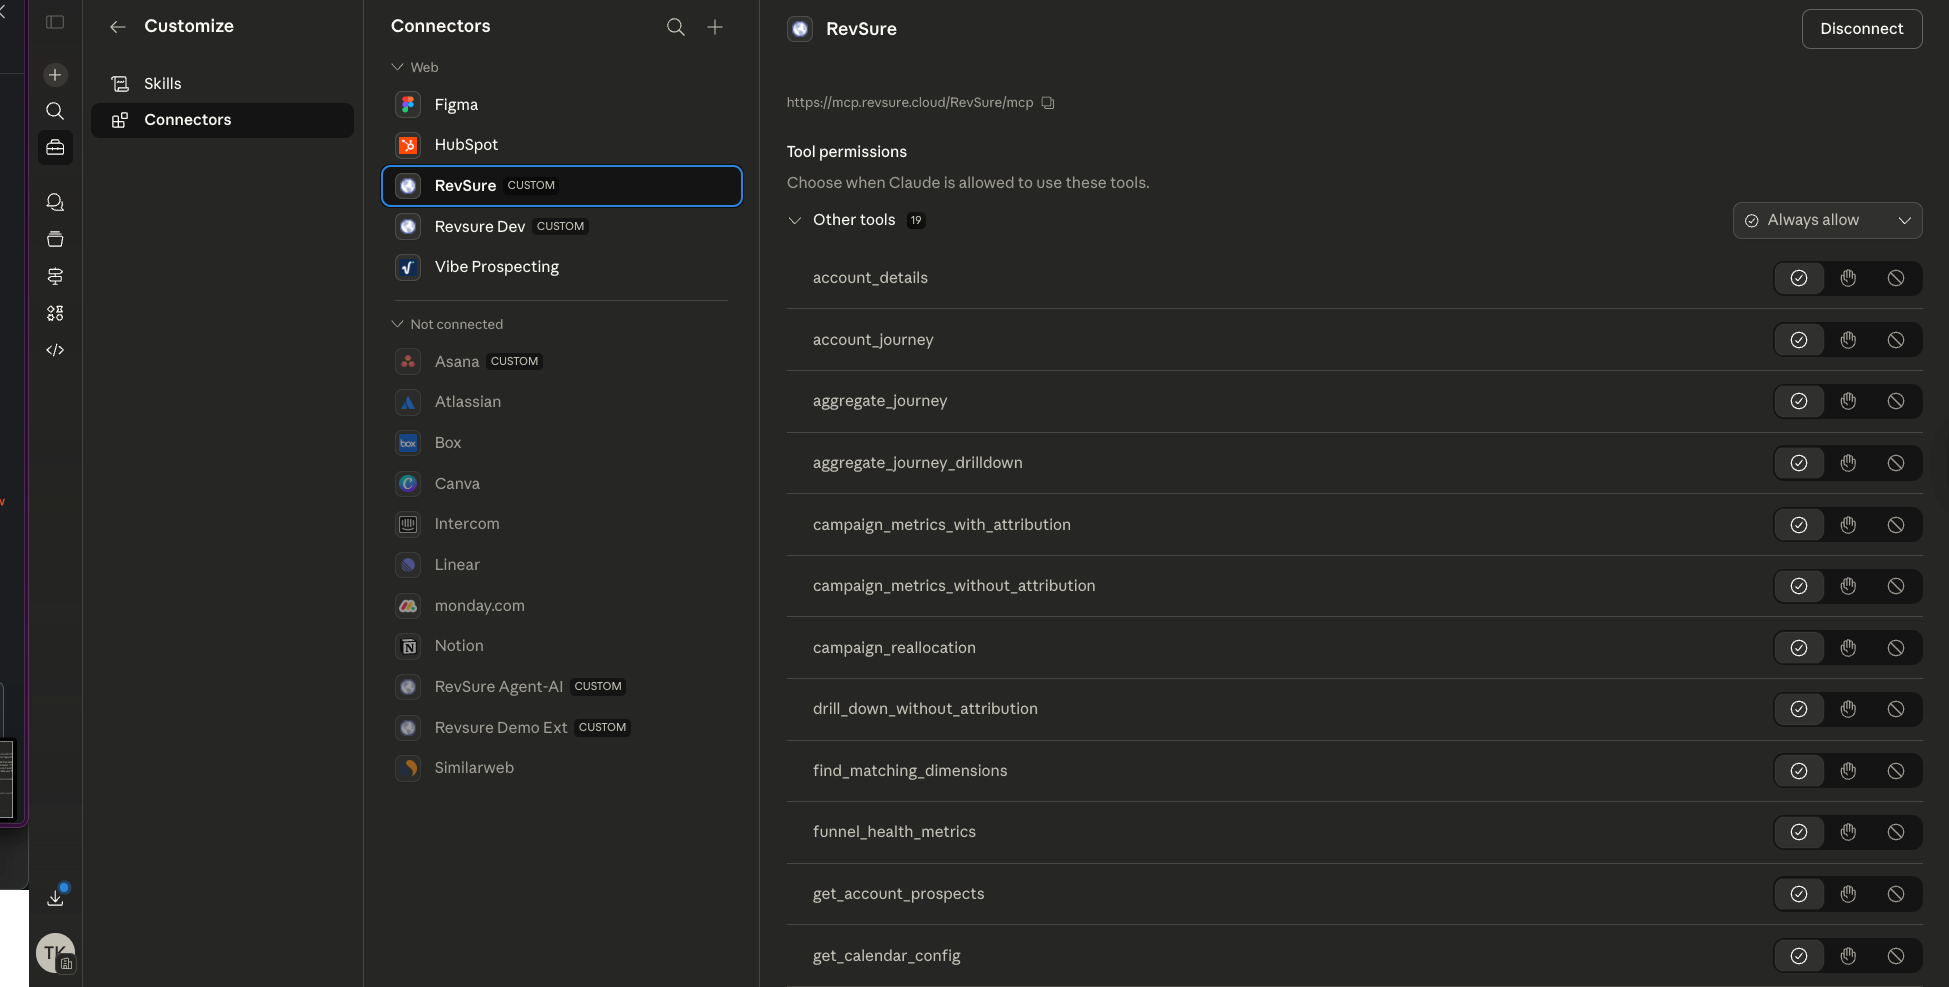
Navigate to Customize > Connectors.
Find the custom connector your Owner added in the list (it will have a "CUSTOM" label).
Click "Connect" to authenticate.
Step 2: Authenticate with RevSure
You will be redirected to the RevSure login page.
Enter your RevSure credentials and log in.
Once authenticated, the connector is active — you can now use Claude with RevSure.
Step 3: Enable Auto-Approval for Tool Calls (Recommended)
Go to Customize (available in the left side panel) → Connectors. Choose your MCP connector.
In tool permissions click on Always Allow for all tools.
This prevents Claude from prompting you for approval on every individual tool call.
Step 4: Start Using the Connector
Open a new chat.
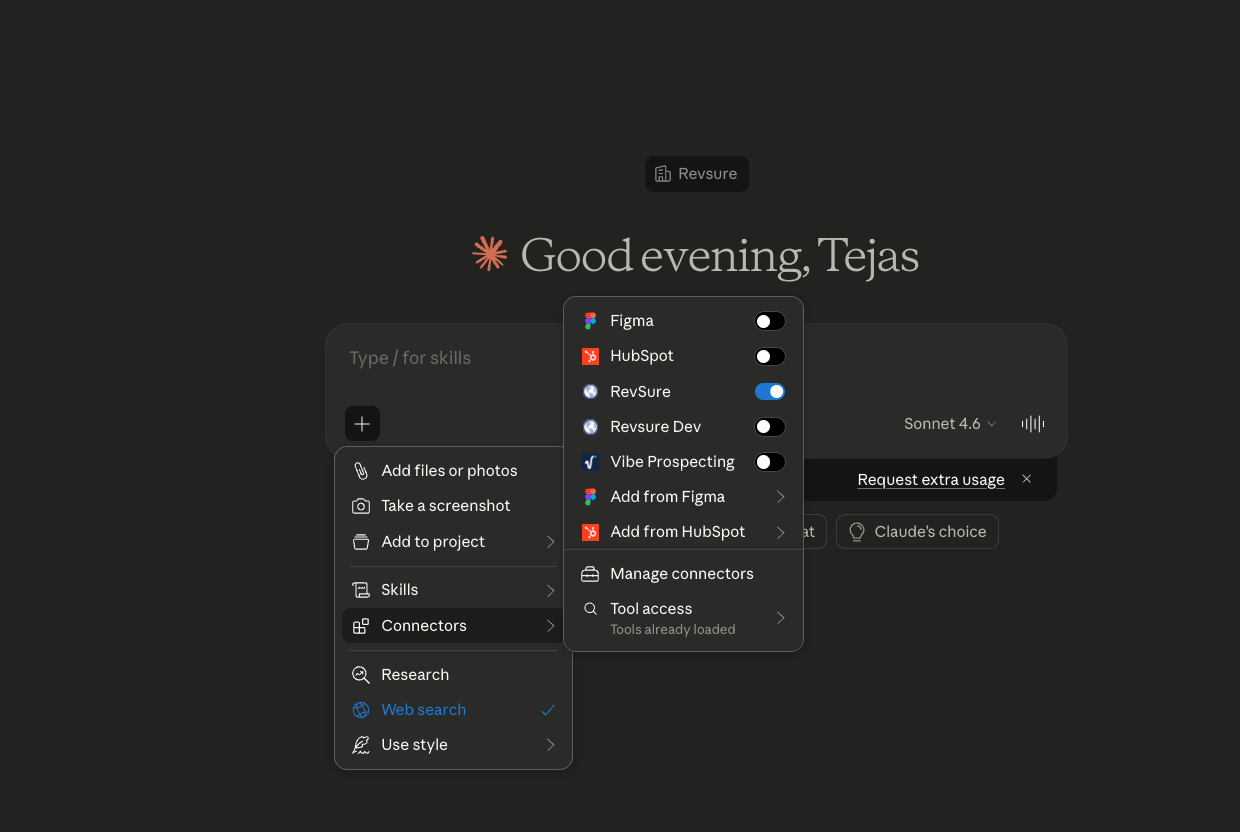
Click the + icon in the input prompt box.
Click on Connectors and make sure the MCP connector is enabled.
Click on Tool Access.
Select the "Tools already loaded" option to enable them for the conversation.